Do you want to create an online store with WooCommerce? Congratulations! In this illustrated step-by-step guide I am going to explain How to set up a WooCommerce store fast!
This post may contain affiliate links and I may earn a small commission when you click on the links at no additional costs to you.
Unlike in years past when you had to hire a developer to build an online store for you, now there are a number of services that allow you to build an eCommerce store with little to no knowledge of coding.
There are literally tons of eCommerce website builders out there. Some are cheap, some are expensive, some are reliable, and some… aren’t.
Read also: Headless eCommerce Explained
Table of Contents
Why to choose WooCommerce
According to the latest statistics, WooCommerce is an indisputable leader with a 28% market share in 2020.
WooCommerce is open-source, which means that many developers are working on it, trying to improve it. It also means that if you want to change it, you can do any modifications.
It is free. You have to pay only for hosting and domain name. So, it’s possible to run a fully functional WooCommerce store for as little as $5 per month.
Unlike subscription based solutions (like Shopify or ecwid), WooCommerce will never shut you down. Since it is your own website, and you don’t have to go through a third party and obey their rules and regulations.
As you see, there are many reasons why WooCommerce is so popular these days, but probably the main one is the fact of how incredibly easy it is to set it up even if you are a complete beginner.
Is WooCommerce free to use?
WooCommerce itself is free but as WordPress plugin, it is self-hosted platform. So, you will need a domain name (average $2- $10 yearly), and a hosting service (average $1-$20 monthly). WooCommerce can have additional costs if you choose to have a premium theme (about $49), extra plugins (started from $10).
How do I get started with WooCommerce?
Since WooCommerce is WordPress plugin, it takes only 9 simply steps to get started:
1. Pick up domain name.
2. Choose hosting.
3. Install WordPress
4. Install storefront theme.
5. Install WooCommerce Plugin
6. Set up payment processor.
7. Set up shipping options.
8. Add products to your WooCommerce shop.
9. Start sell.
Read also: How To Set Up OpenCart Store Fast! Step-by-Step Beginners Guide With Pictures.
The domain name and web hosting for your WooCommerce store
I already covered the basics in How to Start a WordPress Blog in 2020: Step-by-Step Guide. Since WooCommerce is a free WordPress extension, first, you need to choose the domain name and web hosting and create WordPress site.
The simplest way is to choose the suitable web hosting and purchase the domain name from them. With WooCommerce, you will need an SSL certificate, so make sure that your chosen web hosting provider has one.
Read also: ECWID, IS IT REALLY WORTH IT?! AN HONEST REVIEW – PROS, CONS AND ALTERNATIVES
HostGator is one of the most popular all-in-one web hosting providers among WooCommerce shop owners. Their basic plan starts from $2.75/month, and it offers a free SSL certificate, easy WordPress installs, and a free domain name for a year.
So, go ahead and pick up your domain name and choose the hosting plan. The basic plan is enough for beginners, and you can upgrade it later when business picks up.
WordPress Installation
For purpose of this tutorial I will use HostGator hosting. Since they have C-panel, the process will be similar with almost all hosting providers out there.
Automatic installation via Softaculous auto-installer is the easiest way to install WordPress.
To do that, log on into your Hostgator account and launch the c-panel.

In c-panel, scroll down to software section and click on Softaculous icon.
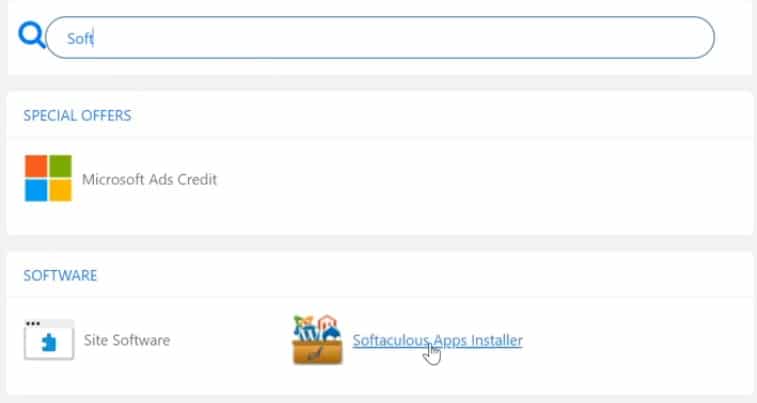
This takes you to a new page where you can install the content management system you want. So, search for the WordPress icon and clock on it.
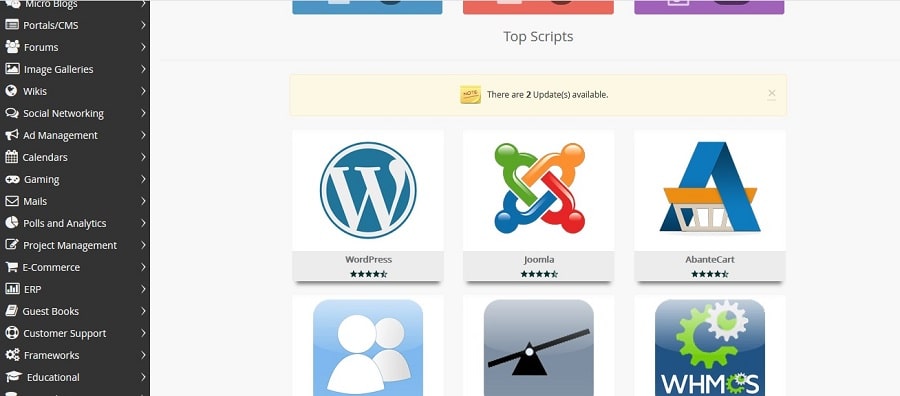
The WordPress Installation page will come up.
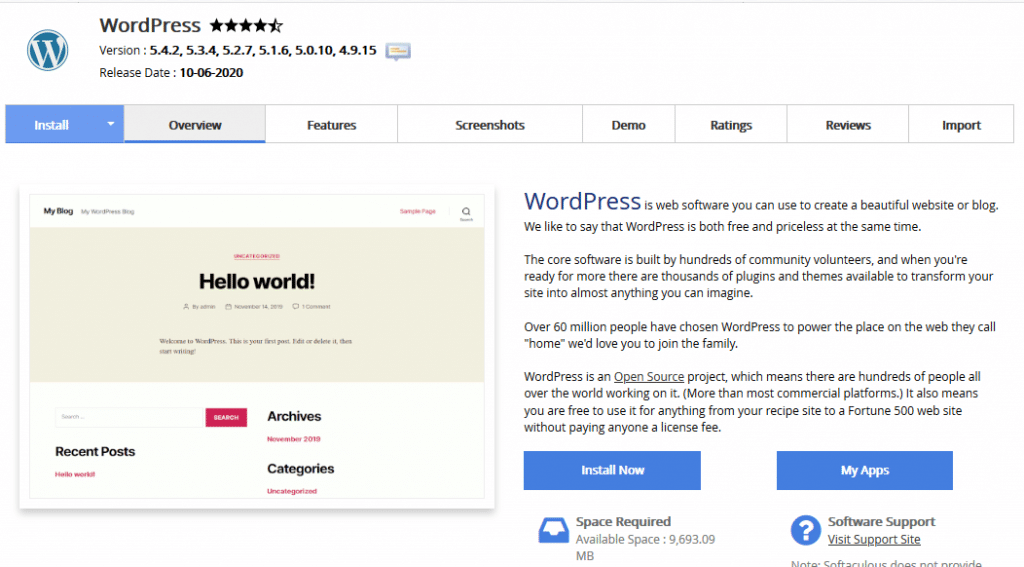
Click “Install Now” button. This will bring you to a new tab where it asks for some information about the WordPress install.

The first thing it’s going to ask us is the version that you want to install. By default, it will always be the newest version of WordPress.
The next thing that you have to do is choose the installation URL. This is going to be the domain that you want to install WordPress on.
Make sure you chose the https protocol, because without it WooCommerce will not work.
The cool thing about HostGator is that they offer free installations of SSL’s on every domain that you have on your plan.
Scroll down, in the second section is the site settings.

For now, leave it as is. This can be changed easily after.
You’ll see an option for enabling multi-site. It’s gonna be unchecked by default. Mulit-site is a way to manage multiple WordPress sites through a single database. It’s a little bit tricky and complicated to get started, so if you’re just installing WordPress for the first time leave this unchecked.
The next section here is Admin Account. Now this is really important because this is how you’ll actually log into your WordPress through the WP Admin

You need to choose a username and a password. Make sure you write down this information somewhere so that you can log in later.
The last thing that you’ll choose here is the Admin Email and it’s important to use an email address here that you know you can get email to. If you do ever lose your password for WordPress you can easily reset it by sending an email to this account. So whichever email you prefer, you can use that here.
The rest of the data you can leave it as is. Just scroll down to the bottom of the page and hit “Install”. The installation process will begin.
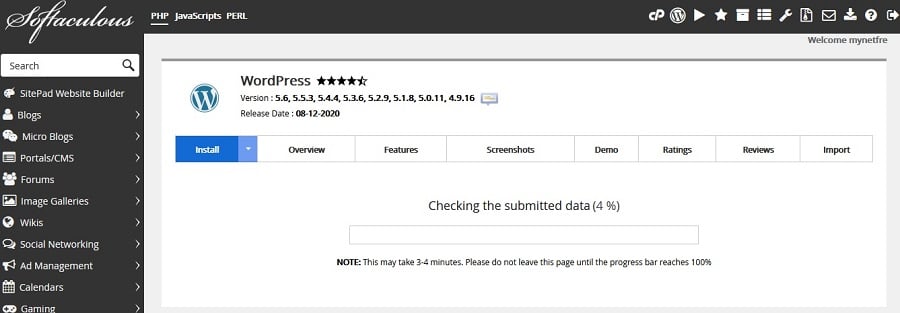
Usually it takes only one or two minutes. When done, you will see the congratulations page.

Here is also a video tutorial about WordPress installation.
WordPress configuration
Next thing, you have to personalize your WooCommerce store. First, you should log in to the WordPress admin page. To do that, type into browser yourdomainname.com/wp-admin/

Use your WP username and password, which you created, and click “Log in”. This will lead you to the WP dashboard.

Before we go any further, you should do a little bit of housekeeping. Go to settings and then permalinks.
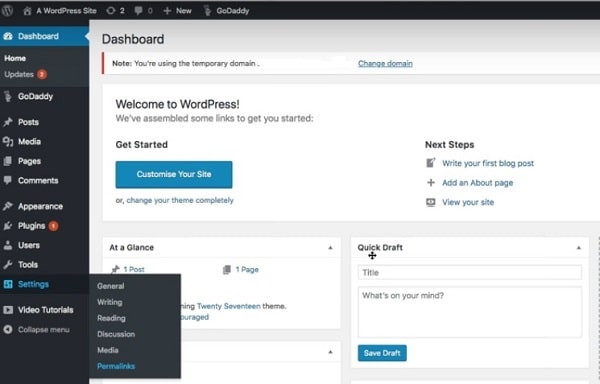
Next, go to settings, select “General Settings.” On top of the page, you will see “Site Title” and “Tagline.” The title represents the name of your website. Together with the tagline, the site title has the role of defining site identity through text. It increases the relevancy of the website content to users. Due to the site title, visitors can easily understand what the website is about. They know what to expect from browsing its pages.
Briefly, you need to change the defaults with an optimized title and tagline. The site title or site name is a short text that’s representative of your website. With just a few words, you can sum up what makes your blog different and how it is unique.
The tagline represents a short description of your entire website. It is also appearing on the search engine results page. Whenever people look for something, and your blog matches their search, your tagline will be the complete title they see in the results. So, set up your “Site Title” and “Tagline” and click “Save changes”. With this initial setup is done.
At this point, you have a default WordPress theme installed, and you can start using it. However, you want to have a WooCommerce shop.
Storefront WordPress Theme
Although there are many WordPress themes suitable for WooCommerce, Storefront is a perfect theme for your next WooCommerce project. It is designed and developed by WooCommerce Core developers, it is free, and it gives you all WooCommerce core features.
Storefront comes with a clean and minimal design that’s open for any kind of customization.
To install it, in the WordPress dashboard, go to Appearance > Themes menu. Select Add new and the group themes by popularity and look for Storefront.
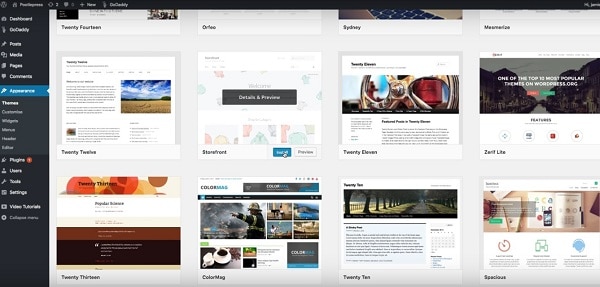
Click Install and then activate.
WooCommerce Installation
After that, you will be prompt to install WooCommerce plugin.

So, install and activate it as well.
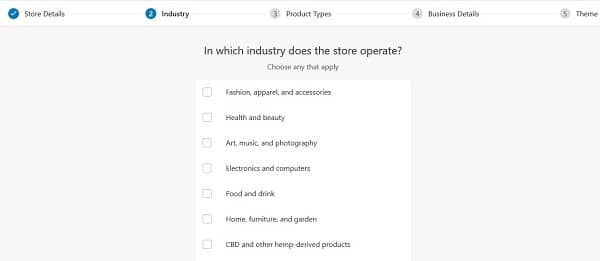
Next, you will see the WooCommerce setup page.

You can come back and change all this information later. First, it gonna ask you which industry your store operates in.
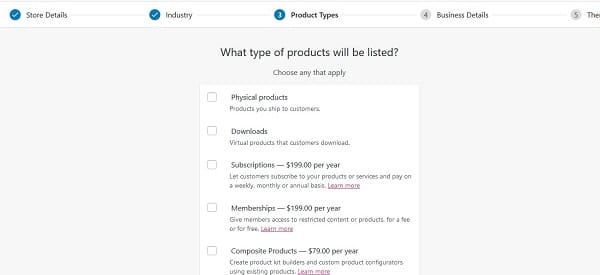
After, things like your location where you’re based, what kind of products you want to sell, whether you’re selling physical or digital products, or selling both.
Finally, it will ask you for some business details.

And then, WooCommerce will prompt you to install Facebook, chimp monkey, and google adds extensions. You can skip this for now and install it later. Click Continue, and you will be led to this screen.
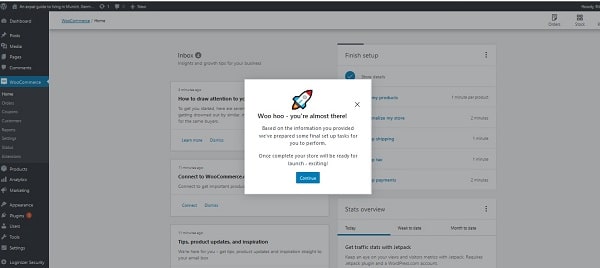
Click continue again. From the next page, you will be able to customize your shop and add new products and payment methods.

Here is also a short video tutorial.
WooCommerce shop configuration
Now, if you type your domain name in the browser, you should see the default storefront home screen.

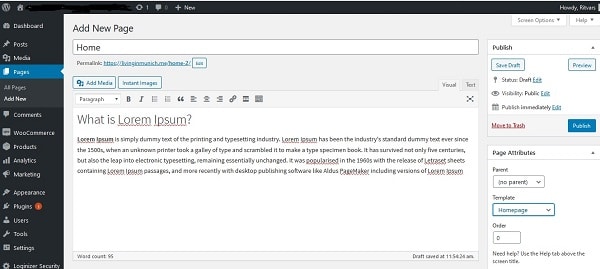
First, you should create your store’s homepage. To do that, go back to your dashboard – pages-add new.

Add title “home” and in text box put your fantastic marketing text, then in wright side in template box select Homepage and then click “Publish”.
Then go to settings-reading and check the static page box, then in homepage box choose “Home” and save changes.

On the front page of your site, this is a really crucial setting. When you first start building a site with WordPress, it’ll begin to live as a simple blog with your posts showing up on the default front page. Here you actually want your page called home to be in front of your store. That just means that this will be the first page what your site visitors will see.
After that, you will probably need to create header menus. So, to do that, go to Dashboard – Appearance-menus. Select create a new menu. Give this menu name “Menu”. On the left side of the page, select view all pages and then select Home-Shop-My account. If you desire, you can add additional pages vital to you. On Display location check boxes “Primary Menu” and “Handheld Menu”.
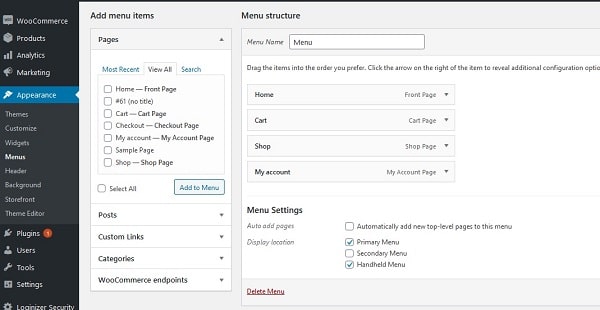
Then click “Save” button.
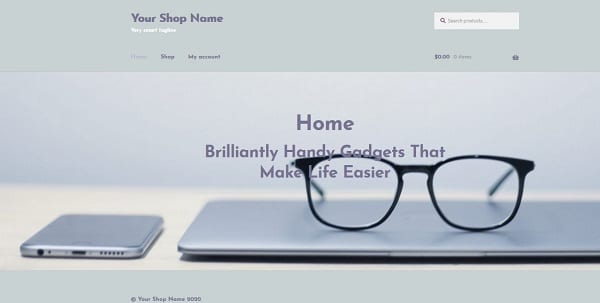
Before to start adding products and set up the preferred payment method is wise to finish with your shop’s visual look. You can customize your front page the same way you customize any WordPress page.
You can add your background image, site logo, and make any other changes which will look your shop appealing to customers. Look how I customize my sample shop just in 5 minutes.
So, now when it’s done, you have to configure preferred payment methods, and then you can start adding products to your shop. To do that, go to Dashboard – WooCommerce.

First click on set up payments.

By default, WooCommerce gives you three options – Their own WooCommerce Payments, PayPal and Stripe. If you are ready to go with one of these, just click on the desired option.
If it is your first eCommerce shop ever, I suggest you to stick with default WooCommerce Payments plugin. If you are interested to know more, read about What Is New WooCommerce Payments plugin?
If you are looking for something specific or your venture is considered a high risk business, read this Online Payment Processing Solutions For WooCommerce Store and Best High Risk Payment Processors For Startups in 2020.
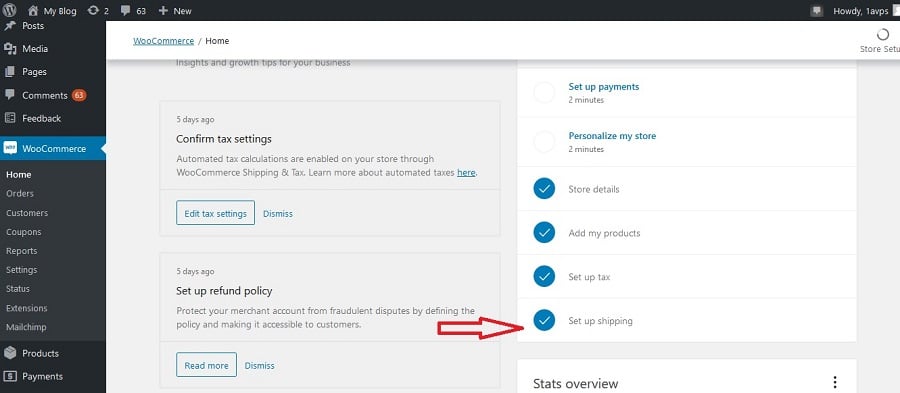
When you are done with payment processors, you should configure tax rates and set up your shipping methods.
These options are also straight forward. Just follow instructions given and you will be done in no time.
WooCommerce: Set Up shipping details
After the payment methods it’s time to configure the shipping details.
In this step, you have to define how much customers must pay for shipping.

You can select several locations and price for each location separately.
WooCommerce: Set Up tax
When customers buy things at your store, they usually have to pay sales tax, which is a percentage of the cost of the item charged by you. Luckily for us, WooCommerce can calculate this tax for you automatically.

Adding products to WooCommerce store
Finally, you can start adding products to your shop. When you click on “Add my products”, you will see three options.

If you already have a .csv file with products, you can import them all in bulk. If you already have a webshop on another platform, you can choose the option to Migrate. This will give you a complete set of instructions on how to perform migration to the WooCommerce platform.
If you just started, you can add products manually. The process is easy. Basically, you create a name, tag line, and product description for each product. It is similar to function when you start a new blog post.

After you have to set up price, product attributes, shipping information, linked products, and image gallery. When it is done, click “publish.”
Useful plugins for WooCommerce
WooCommerce is a powerful platform all on its own. However, you can make it even better. Besides common and well known WordPress plugins such as Yoast or MonsterInsights, there are also specific plugins for WooCommerce. These plugins allow you to add extra features to your WooCommerce store and there are tons of free and premium plugins for it.
Mailchimp
The easiest way to create a database of your existing clients is by collecting email addresses in an email list. The Mailchimp plugin is one of the best free plugins for this.
The plugin automatically subscribes your customers to a mailing list after specific actions — such as placing an order or when an order’s status moves to completed. Or, if you’d prefer, it gives them the option to subscribe on the checkout screen by ticking a checkbox.
Advanced Shipment Tracking for WooCommerce
This plugin integrates with more than a hundred shipping providers, including famous names such as USPS, UPS, FedEx, etc.
The plugin adds a new ‘Delivered’ order status that can send an email to customers when their order has been delivered. With the TrackShip integration, you can even automate this process. So, orders are automatically marked as delivered as soon as the tracking info updates.
Variation Swatches for WooCommerce
This plugin helps you to create visual representations of the variable products at your store, which can help shoppers to understand exactly what you offer.
For example, if you sell a T-shirt in three different colors, this plugin lets you display icons with the all colors available.
Discount Rules for WooCommerce
WooCommerce has built-in coupon functionality, but it’s not very flexible. This plugin gives you more options with cupon types and discounts you offer. For example, you can create special ‘buy two and get 10% off’ promotions. You can also create a deal that gives customers 10% off if they spend over $100 (or any other minimum order).
YITH WooCommerce Zoom Magnifier
Customers usually want to inspect the products for quality, and they want to give a closer look. YITH WooCommerce Zoom Magnifier plugin allows to see an enlarged popup of your products each time the customer hovers their mouse over product images.

You might have seen something similar on Amazon website.
Pros and Cons of WooCommerce
Probably every blog post about WooCommerce contains this section (an exception might be only articles from WooCommerce itself).
In my humble opinion, Pros and Cons always depend on the specific needs of your business. A Pro in one scenario could be a Con in another. For this reason, I’ll generalize this as much as possible.
Pros of WooCommerce
- WooCommerce is free, as well as WordPress
- It works flawlessly with WordPress and has an excellent interface to users who are already using that platform.
- The features of WooCommerce are simple enough to set up a basic store in no time.
- It is easy to install, and for users that are already familiar with WordPress, it takes little time to understand it.
- It immensely popular and has an extensive community online.
- It is 100% customizable and offers lots of flexibility
- It is a cost-effective solution for startups and small entrepreneurs.
Cons of WooCommerce
1. It is linked with WordPress and cannot be used without it.
2. While basic themes and plugins are free, the premium ones cost a lot.
WooCommerce Store Examples That Will Inspire You
And finally, here is a list of 10 excellent WooCommerce store examples. Maybe in the process of creating your own WooCommerce shop, you can draw inspiration from these examples.
- Bluestar Coffee Roasters
- Caesar’s Ice Cream
- Custom Seafood
- Dark Horse
- Earthbound
- Jack Rudy Cocktail Co.
- Joco Cups
- Porter and York
- Root Science
- Underwear Expert
Let’s wrap it up
An eCommerce store doesn’t just boost your income. It provides an alternate stream of revenue and enables businesses to reach a much larger market than a good ol’ Brick and mortar estabilshment.
WooCommerce is an excellent solution for beginners and professionals to create an online store – big or small. It is fully customizable, it means, WooCommerce is not formatted just for one type of e-commerce. Regardless of what you are willing to sell, you can make changes to the plugin and adapt it to needs of your business.
So, are you ready to set up your own WooCommerce store now?!
Read also: Prestashop, An Honest Opinion About Installation, Configuration, And Usability
Read also: How To Set Up OpenCart Store Fast! Step-by-Step Beginners Guide
Read also: OpenCart vs PrestaShop. Facts And Real-life Users Experience